This bobbin lace doily came from a thrift shop. I spent a lot of time (and money!) at the thrift and antique shops this winter.
Tuesday, March 22, 2011
Lacy Lovelies
As a historical costumer I've learned a little about lace, at least enough to recognize the good stuff. I came across this handmade battenburg lace doily at a garage sale. I think I paid 10 cents for it.
Unfortunately it has some stains that I haven't been able to soak out. I think it's beautiful anyway. Speaking of Battenburg, I need to repair the lacing on my tablecloth. Not a hard repair, I just need to do it. Along with a hundred other things LOL!
This bobbin lace doily came from a thrift shop. I spent a lot of time (and money!) at the thrift and antique shops this winter.
One of these days I will excavate my sewing room and drag out the lace trim to show you all.
This bobbin lace doily came from a thrift shop. I spent a lot of time (and money!) at the thrift and antique shops this winter.
Sunday, March 20, 2011
Im In Love
Garage sale season has started in earnest so it's time to dust off the blog. I found a beautiful pink milk glass bowl yesterday and I am in love with it. The guy running the garage sale gave me carte blanche to pick through the containers in the garage. This beauty was buried deep in a plastic bin in a tiny bathroom.
Jeannette Glass Company Shell Pink Milk Glass Lombardi Bowl

How much? $1.50!
A couple of pickers showed up at this garage sale. They were a marvel to watch. They were very fast and were very good at spotting the vintage stuff. They beat me to the cheap cast iron plant stands but Miss Amateur here beat them to the milk glass.
I did most of my hunting Friday. It seemed like a fine thing to be able to go on a Friday as I am usually working. But thanks to Spring Break and a tax return I was able to go out and have a great time.
I added to my china collection. I really should stop though. I over-loaded my cabinet that I keep my china in and had to box up most of it. I'm eyeballing the closet in the media room thinking it would make a great place to put shelves to hold my hoard.
This was a set of 7 dinner plates and 7 bread and butter plates. $3.00 for all.
It has a pattern of white on white with platinum trim. I tried to capture the pattern but couldn't quite manage it.
8 dinner plates, 8 B&B plates, 2 berry bowls $5.00
I've been entertaining myself at the thrift and antique shops while waiting for garage sale season to start. I finally have a silver tea set! The tea pot came from a thrift shop, the rest are garage sale finds.
Jeannette Glass Company Shell Pink Milk Glass Lombardi Bowl
A couple of pickers showed up at this garage sale. They were a marvel to watch. They were very fast and were very good at spotting the vintage stuff. They beat me to the cheap cast iron plant stands but Miss Amateur here beat them to the milk glass.
I did most of my hunting Friday. It seemed like a fine thing to be able to go on a Friday as I am usually working. But thanks to Spring Break and a tax return I was able to go out and have a great time.
I added to my china collection. I really should stop though. I over-loaded my cabinet that I keep my china in and had to box up most of it. I'm eyeballing the closet in the media room thinking it would make a great place to put shelves to hold my hoard.
This was a set of 7 dinner plates and 7 bread and butter plates. $3.00 for all.
I've been entertaining myself at the thrift and antique shops while waiting for garage sale season to start. I finally have a silver tea set! The tea pot came from a thrift shop, the rest are garage sale finds.
Monday, January 3, 2011
Me, My RV & Paula Deen
My sister just created a blog to showcase all the lovely food she cooks. Anne is a talented cook and has graduated from Le Cordon Blue as a patisserie chef. I'm always begging her to make me chocolate truffles! She's also Queen of the Creative Folded Napkin after working for years in the hotel industry. One of these days I'm going to have her show me some new tricks.
Please stop by and have a look at her first blog feast! To make it even more amazing she created all this in an RV kitchen with a toaster oven. The woman is dedicated!
Me, My RV & Paula Deen
Please stop by and have a look at her first blog feast! To make it even more amazing she created all this in an RV kitchen with a toaster oven. The woman is dedicated!
Me, My RV & Paula Deen
Saturday, January 1, 2011
New Year's Tablescape
I'm so glad Dollar Tree was open today. I remembered seeing some nice white china plates with thin bands of gold and I wanted them for my table. We had company for dinner tonight and I wanted something extra nice that wouldn't break the bank. I hit WalMart's 75% off Christmas decor sale for table decorations. I'm going back tomorrow and buying 8 red chargers for $2.50. They're plastic but it's a start down charger lane.


\

I gave the middle daughter, Richelle, a demonstration on the care and feeding of silver-plated flatware. She will be inheriting this set and with proper care it will last to be handed down to her children.
Glass tea goblets Dollar Tree
Plates and soup bowls Dollar Tree
Gold and cream napkins Garage Sale
Boopie candle holders Goodwill
Flatware The Nanny Collection
Chargers Walmart
Glitter decorations WalMart
Linen tablecloth Garage sale
Glass tea goblets Dollar Tree
Plates and soup bowls Dollar Tree
Gold and cream napkins Garage Sale
Boopie candle holders Goodwill
Flatware The Nanny Collection
Chargers Walmart
Glitter decorations WalMart
Linen tablecloth Garage sale
Super Goodwill Goodness!
Lookie what I found yesterday! It was marked $5.00 but they were having a sale so I paid less than that. I'm not that wild about the subject matter but it's pretty and it goes with the theme of old prints in my dining room. Jeff even liked it and I have to admit I was surprised that he did. I figured I get an eye roll at the very least LOL!
Close-up of the frame
The original gold leaf has been painted over but it still has the original glass and I'm going to assume the original print. What's amazing is the gesso is mostly intact. There are only a couple of small damaged spots. Turns out it was donated by the cashier who checked me out. All she could tell me is that it had hung in her Grandmother's house for many years. It was given to her Grandmother by her Aunt in Houston and it was old when she bought it.
Thursday, December 30, 2010
Ornament Placeholders
For those strolling in from Between Naps On The Porch the instructions for the eggs are towards the bottom of this post. Thanks for stopping by!
Christmas is past and ornament placeholders are now passe. BUT, if you will scroll to the bottom I will show you how to make a placeholder out of just about anything. If it has a hole, or you can make a hole and it is able to stand upright you're in business!

I loved the ornament place holders on the tablescapes of BNOTP and the The Tablescaper. I loved them so much that I thought I would make my own and share that process with you.
The first way is the easy way and works great in a pinch.
You'll need
1 ornament
2 wire ornament hanging loops (scavenge the second one from another ornament)
Sand, bath crystals, rice, peas or what have you to use for ballast to keep the ornament upright.
I used

Ok, it was all I had on hand! Sand or bath crystals would be best if you are going to make them ahead of time or leave them out for a few days. Ants or other bugs crawling out of your place holders wouldn't be a good thing during dinner.
Here are your parts. Remove the top and pour your ballast into the hole in the ornament until it is about half full. Put both loops into the top and replace on the ornament. Gently shake your ballast to even it out so the ornament will stand upright. You may need to do this a few times until you get it just right.

Viola!

The second method is more fiddly and is great if you need to get your craft on.
You'll need
1 ornament
Thin wire. I used 20 gauge for this demonstration.
1 pencil
Wire cutters
Needle-nose pliers
Ballast

Cut a length of wire that is comfortable to work with. I cut mine to 9 inches. Straighten the wire as much as possible. Place the pencil against the middle of the wire and wrap one end around the pencil twice to make a double loop.
Remove the pencil. Leaving about about 2 inches of tail on each wire, trim the bottom of your wires evenly. You will want these rather long so that they expand against the inside of the ornament. If you cut them too short your wire loops will wobble around in the top of the ornament and aggravate you to death
If you need to, slide the pencil back through your loops and adjust until even. Then slide the wire through the ornament top. Pull the wires apart to create a little tension.
Replace the top on the ornament being careful not to bend your wires in too much.
You're done!

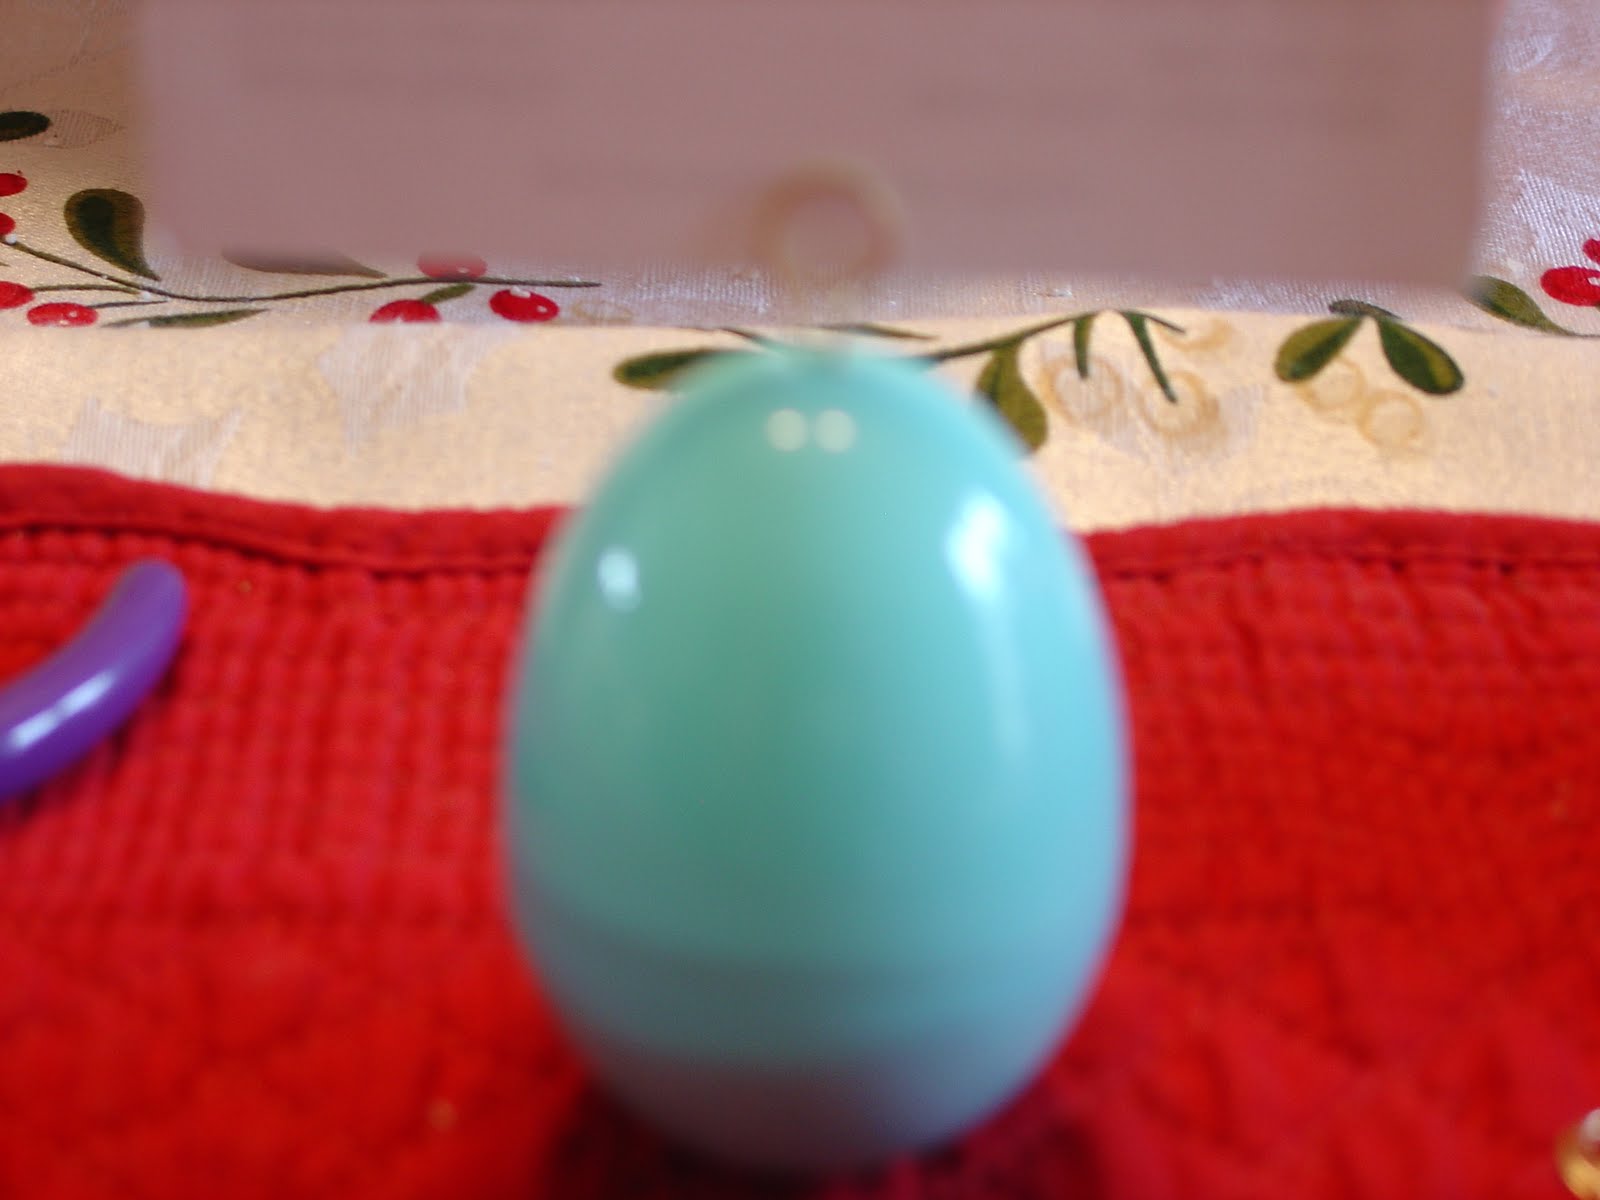
This method also works for plastic Easter eggs. Use a hot ice pick to poke a hole in the top. I used a cork screw as someone took mine out of my toolbox. I wonder who that could have been? cough Jeff cough. The corkscrew left a ragged hole on the top so if you have to use that you'll want to cover it up with some decoration. You'll need to experiment to find the right length to cut the tails. I used the wire loop from my ornament demonstration and it's a little long but it demonstrates the concept. Why an Easter egg? Christmas is gone for another year and there is a whole year of tablescaping ahead. I just wanted to give you an idea to get you started.

Labels are easy. I would suggest a sheet of blank business cards and your printer. I don't have pretty handwriting so that is the route I would take.
You could dress up plain ornaments with glitter, paint, lace or fabric. Let your imagination guide you and have fun!
Please visit Susan at Between Naps On the Porch for more great Metamorphosis Monday!
Christmas is past and ornament placeholders are now passe. BUT, if you will scroll to the bottom I will show you how to make a placeholder out of just about anything. If it has a hole, or you can make a hole and it is able to stand upright you're in business!

I loved the ornament place holders on the tablescapes of BNOTP and the The Tablescaper. I loved them so much that I thought I would make my own and share that process with you.
The first way is the easy way and works great in a pinch.
You'll need
1 ornament
2 wire ornament hanging loops (scavenge the second one from another ornament)
Sand, bath crystals, rice, peas or what have you to use for ballast to keep the ornament upright.
I used
Ok, it was all I had on hand! Sand or bath crystals would be best if you are going to make them ahead of time or leave them out for a few days. Ants or other bugs crawling out of your place holders wouldn't be a good thing during dinner.
Here are your parts. Remove the top and pour your ballast into the hole in the ornament until it is about half full. Put both loops into the top and replace on the ornament. Gently shake your ballast to even it out so the ornament will stand upright. You may need to do this a few times until you get it just right.
Viola!
The second method is more fiddly and is great if you need to get your craft on.
You'll need
1 ornament
Thin wire. I used 20 gauge for this demonstration.
1 pencil
Wire cutters
Needle-nose pliers
Ballast
Cut a length of wire that is comfortable to work with. I cut mine to 9 inches. Straighten the wire as much as possible. Place the pencil against the middle of the wire and wrap one end around the pencil twice to make a double loop.
Replace the top on the ornament being careful not to bend your wires in too much.
You're done!
This method also works for plastic Easter eggs. Use a hot ice pick to poke a hole in the top. I used a cork screw as someone took mine out of my toolbox. I wonder who that could have been? cough Jeff cough. The corkscrew left a ragged hole on the top so if you have to use that you'll want to cover it up with some decoration. You'll need to experiment to find the right length to cut the tails. I used the wire loop from my ornament demonstration and it's a little long but it demonstrates the concept. Why an Easter egg? Christmas is gone for another year and there is a whole year of tablescaping ahead. I just wanted to give you an idea to get you started.
Labels are easy. I would suggest a sheet of blank business cards and your printer. I don't have pretty handwriting so that is the route I would take.
You could dress up plain ornaments with glitter, paint, lace or fabric. Let your imagination guide you and have fun!
Please visit Susan at Between Naps On the Porch for more great Metamorphosis Monday!
Wednesday, December 29, 2010
New To Me
For years my Mom had a shadow box hanging in her living room. I always thought it was the coolest thing. But then I have a fascination with mirrors as anyone who has ever visited my home can attest. I've always wanted my own shadowbox but they aren't exactly in vogue nowadays and buying one on e-bay was out because of shipping costs. Well I got lucky is all I can say and found one at a local antique shop.
Ta-da!
I even got them to knock 5 dollars off the price. Heh. Jeff hung it for me like the sweetie he is. He asked me if if I had anything to put on it. You bet! It was filled in less than 15 minutes. My little bird plates are held to the glass with tape, they wouldn't stand on their own. They sure look pretty.
Sunday, December 26, 2010
Christmas Tablescape

I hope you all had a wonderful Christmas. We had a great Christmas with good food and lots of presents. Today I am posting the tablescape I created for the occasion. I love creating tablescapes and the best part is that my family enjoys them too. I think I am getting a little better at photographing my tablescapes.
This Christmas tablescape is a mix of inherited pieces and vintage items picked up at garage sales. I think from now on I shall refer to the inherited items as the Nanny Collection.
Lucky me, WalMart put their holiday linens on sale BEFORE Christmas. I snapped up this pretty tablecloth and 8 matching embroidered napkins for less than $20 dollars. I like those kind of deals!
The silverware is Rogers Adoration from the Nanny Collection. We inherited a basic service for 8 that I have expanded to service for 12 with serving pieces. Thank goodness for for e-bay!
Now I am off to have my favorite post Christmas breakfast. Ham, grits and biscuits!
Be sure to visit Susan at Between Naps On The Porch for more fabulous tablescapes!
Saturday, December 25, 2010
Merry Christmas!
❤♫❤♫❤♫❤ .•*¨`*•..¸☼ ¸.•*¨`*•.♫❤♫❤♫❤♫❤.
╔═════════ ೋღ❤ღೋ ═════════╗
ೋ ❤❤❤~~Merry Christmas~~❤❤❤ ೋ
╚═════════ ೋღ❤ღೋ ═════════╝
❤♫❤♫❤♫❤ .•*¨`*•..¸☼ ¸.•*¨`*•. ♫❤♫❤♫❤♫❤.
╔═════════ ೋღ❤ღೋ ═════════╗
ೋ ❤❤❤~~Merry Christmas~~❤❤❤ ೋ
╚═════════ ೋღ❤ღೋ ═════════╝
❤♫❤♫❤♫❤ .•*¨`*•..¸☼ ¸.•*¨`*•. ♫❤♫❤♫❤♫❤.
Thursday, December 23, 2010
Mango Chutney
This is the best stuff to serve with ham. Every year I am searching for the recipe so I am posting it here.
Simple Mango Chutney
Fruity bites of mango and golden raisins are energized with ginger, vinegar, cinnamon and sugar and caramelized into a golden sweet and sour treat that glistens like polished glass. This easy recipe will amaze your friends and family and eliminate the mystery of the costly gourmet chutneys you’ve seen at the store.
INGREDIENTS
1 bag (12-16 ounces), frozen mango chunks thawed
1 1/2 cups vinegar
1 1/2 cups granulated sugar
1 box (12-16 ounces) of golden raisins
1 teaspoon ginger
1 teaspoon nutmeg
1 teaspoon cinnamon
1 teaspoon salt
INSTRUCTIONS
Simple Mango Chutney
Fruity bites of mango and golden raisins are energized with ginger, vinegar, cinnamon and sugar and caramelized into a golden sweet and sour treat that glistens like polished glass. This easy recipe will amaze your friends and family and eliminate the mystery of the costly gourmet chutneys you’ve seen at the store.
INGREDIENTS
1 bag (12-16 ounces), frozen mango chunks thawed
1 1/2 cups vinegar
1 1/2 cups granulated sugar
1 box (12-16 ounces) of golden raisins
1 teaspoon ginger
1 teaspoon nutmeg
1 teaspoon cinnamon
1 teaspoon salt
INSTRUCTIONS
- Combine ingredients in a large bowl and pour into a heavy bottomed saucepan.
- Bring mixture to a boil then reduce to a medium heat.
- Cook until thickened, stirring regularly to avoid scorching, for 20-25 minutes.
- Chill before serving.
Saturday, November 13, 2010
Goodwill Goodness 2
I am trying to ignore the siren song of potential garage sales on this fine, chilly, sunny Saturday morning. I will not grab the pile of shiny quarters beckoning from Jeff's nightstand. I will be content with the 50 cent spending spree at a garage sale on the way home from work yesterday. I will not die if I don't go to a garage sale.
So, in an effort to distract myself and possible entertain you, my readers, I present my latest Goodwill find. A Reed and Barton hotel silver bowl. Reed and Barton supplied the Navy with silver serving pieces at one time and I think this may have been one of those pieces. It has USN stamped into the bottom.
Before ( I actually remembered to take a before shot!)

After.
Someone loved this bowl and took care of it. It polished up like a dream. Too many times I've brought home something that took an hour or two of polishing to make it look half this good.
I think perhaps it will go on my dining room table. When I go grocery shopping Monday I am going to buy some apples to put in it. ( I hate Monday paydays.)
For now I am going to take a bath and then work on my problem child. My Mother gave me this silver pitcher and it is the cutest thing. It has some kind of film on it that is an absolute beoch to get off. It's getting there though.
I think the garage sales have shut up now. I don't have the money and it's more fun if I have 20 dollars to spend. If I go sure as anything I will find at least 5 things that I've been looking for and will have to leave them behind. Which is why I had to leave behind the green glass Wexford salt and pepper shakers I saw at that garage sale yesterday! Grrrrrr!
So, in an effort to distract myself and possible entertain you, my readers, I present my latest Goodwill find. A Reed and Barton hotel silver bowl. Reed and Barton supplied the Navy with silver serving pieces at one time and I think this may have been one of those pieces. It has USN stamped into the bottom.
Before ( I actually remembered to take a before shot!)
After.
I think perhaps it will go on my dining room table. When I go grocery shopping Monday I am going to buy some apples to put in it. ( I hate Monday paydays.)
For now I am going to take a bath and then work on my problem child. My Mother gave me this silver pitcher and it is the cutest thing. It has some kind of film on it that is an absolute beoch to get off. It's getting there though.
Tuesday, November 9, 2010
Let There Be Light

I've recycled this post for Metamorphosis Monday with Susan of Between Naps On The Porch.
A neighbor recently passed away and her daughter held a garage sale after she cleaned out the house. I went by several times over the weekend as they were still putting out stuff from the storage shed. I found a few pieces of vintage glass but this little lamp was nowhere in sight. On Monday I was headed to work and I noticed a large pile of stuff put out on the curb for the trashman. Well Miss Opportunistic here wasn't going to let that trash pile go unpicked. A milk glass lamp caught my eye so I stopped and when I picked it up I noticed this little gem. This is the after picture. Who knows how many years it's been since this lamp was actually used but now it is shining brightly.

The next picture is as good as it gets for a before. I'm terrible about taking before photos. I just go excited and start going for the after. When I picked up the lamp I couldn't believe that the glass was intact, no breaks, chips or cracks at all. It was filthy and the wiring needed replaced but that was small stuff. I couldn't say the same for the milk glass lamp, it had a huge piece missing out of the base and only one piece was salvageable.
Sunday, November 7, 2010
What I've Been Up To
I spent few days with my Mom week before last and of course we had a a thrifting expedition. We finally made it to the Catholic charity resale shop and then she took me to an awesome place called Savers.
The charity shop had a few goodies, mostly in the form of 5 damask napkins at 25 cents a pop. I also picked up a modern reticulated plate to add to my white molded plate collection.
We hit the jackpot at Savers. I've been wanting a romantic place setting but at $40 dollars a place setting the Pope Gosser Cathay Rose I really like was out of the question. So when I saw this it had to come home with me. I bought 7 dinner plates, 4 for $2.99 and 8 salad plates 6 for $2.49. You can't beat those prices! The pattern is Beverly Rose by Tabletops Unlimited. (The red-headed duck is quite pleased with all the attention and photo ops.)
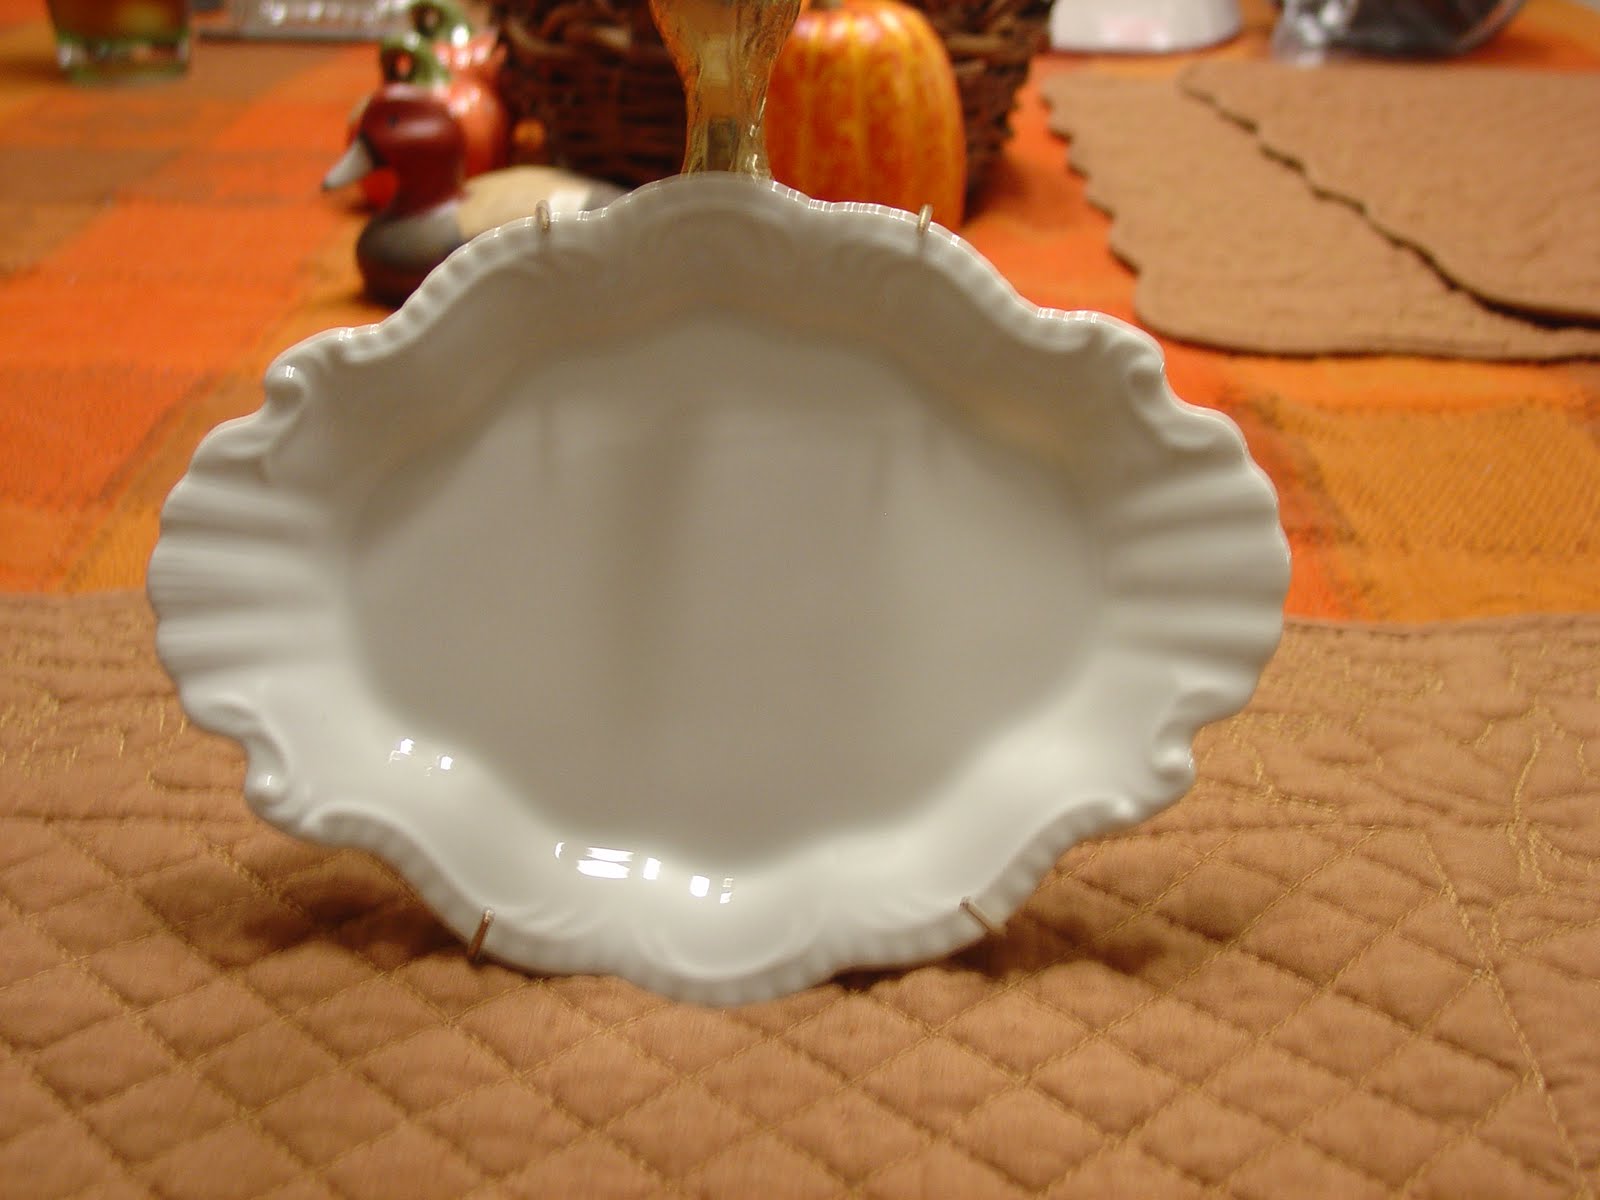
Look at that molded edge! I'm sure there is a technical term for this but I don't know what it is.

I also picked up this little lovely at Savers. It's Rogers silverplate and it is was $4.99.
And speaking of molded edges, this came from an estate sale. I think it was 75 cents. This was a purchase I made several weeks ago but since we're talking molding it was appropriate


I have lots more to catch up on as I have been a bad blogger.
See you soon!
The charity shop had a few goodies, mostly in the form of 5 damask napkins at 25 cents a pop. I also picked up a modern reticulated plate to add to my white molded plate collection.
We hit the jackpot at Savers. I've been wanting a romantic place setting but at $40 dollars a place setting the Pope Gosser Cathay Rose I really like was out of the question. So when I saw this it had to come home with me. I bought 7 dinner plates, 4 for $2.99 and 8 salad plates 6 for $2.49. You can't beat those prices! The pattern is Beverly Rose by Tabletops Unlimited. (The red-headed duck is quite pleased with all the attention and photo ops.)
I also picked up this little lovely at Savers. It's Rogers silverplate and it is was $4.99.
I have lots more to catch up on as I have been a bad blogger.
See you soon!
Thursday, November 4, 2010
Tablescape Thursday

Today I am joining Susan from Between Naps On The Porch for my first tablescape!
I love autumn hues and here I've gone wild with the oranges and browns. With the exception of the wine glasses, the items used are our every day dishes.
Close up of the place setting. I have a twig basket filled with pinecones and a couple of fake gourds as the centerpiece. The place mats were purchased at a garage sale and have oak leaf and acorn pattern quilting. They were originally sold at Wal-Mart and I just couldn't afford them at the time. They look like they have never been used and I got 6 of them for 3 dollars. Now that's my kind of bargain! I also picked up 4 blue place mats at the same garage sale. Another set I had been wanting too. I was a happy camper that day.
The red-headed duck has flown in from the bookcase to keep us company. Next to him is the pumpkin salt shaker. I love these little salt and pepper shakers. They were three dollars at Wal-Mart.
Silverware - Rogers Futura Stainless (Nanny.)
Place mats - Garage sale, 50 cents each.
Tablecloth - Purchased from Wal-Mart long ago.
Napkins - Walmart 2.00 for a pair.
Wine Glasses - Unkown pattern, Garage sale 4 for 2.00.
Monday, October 11, 2010
Simulating Fall
It's sorta Fall outside. The nights have been quite chilly but old Mr. Summer is giving it a last gasp during the day. It's 85 degrees right now and rather warmish so I've retreated to the air-conditioned kitchen to make candles. My favorite Fall candle scent is Pumpkin Spice found at Wal-Mart. I buy a big one every year and it usually lasts through the winter. I've been craving the scent so I melted down the ends from previous years candles and made some new ones.
(No pictures yet. My laptop has decided to quit reading disks.)
Sunday, October 3, 2010
Not Enough Week In The Weekend
Boy was this a short weekend. I've been trying to organize and declutter and sometimes I am just overwhelmed by my stuff. Maybe it's time for an Etsy store, if I can make myself part with anything at all. Yah right!
So I spent three days with my Mom last week and we had a blast thrifting. I found out I inherited my love of dishes from her. Big surprise there right? So here is what I thrifted.
I haven't been able to locate the pattern yet. Any ideas my fellow glass aficionados?? There were 4 of each and despite telling myself I was NOT going to spend any money they were my favorite price. So, well, you know how that went. If it's a dollar I have to have it. I'm going to have to figure out a way to store glasses now LOL!
Mom picked up some punch cups and short glasses in the Wexford pattern. She loves that pattern. I picked up some additional pieces for her at the Saturday garage sales. I was thrilled to find a relish tray for her in that pattern. It's so pretty and sparkly. I'm having trouble parting with the bowl I found though. Sorry Mom!
I also brought home some lovely vintage colored pyrex bowls that belonged to my Grandmother and a hand made quilt that features vintage handkerchiefs shaped into butterflies. One of the handkerchiefs belonged to my Grandfather. My Mom made the quilt for me and used the stash of handkerchiefs my Grandmother accumulated. (My Grandmother was an outright hoarder so I have scapegoat for my hoarding tendencies. I feel for my children when I pass on LOL! She passed away in 2006 and my Mother is STILL cleaning stuff out of her house.) I love it. I wish I had a guest room to put it in.


Some individual shots of the butterflies. The first butterfly is the Grandpa handkerchief. How cool is that?
So I spent three days with my Mom last week and we had a blast thrifting. I found out I inherited my love of dishes from her. Big surprise there right? So here is what I thrifted.
Mom picked up some punch cups and short glasses in the Wexford pattern. She loves that pattern. I picked up some additional pieces for her at the Saturday garage sales. I was thrilled to find a relish tray for her in that pattern. It's so pretty and sparkly. I'm having trouble parting with the bowl I found though. Sorry Mom!
I also brought home some lovely vintage colored pyrex bowls that belonged to my Grandmother and a hand made quilt that features vintage handkerchiefs shaped into butterflies. One of the handkerchiefs belonged to my Grandfather. My Mom made the quilt for me and used the stash of handkerchiefs my Grandmother accumulated. (My Grandmother was an outright hoarder so I have scapegoat for my hoarding tendencies. I feel for my children when I pass on LOL! She passed away in 2006 and my Mother is STILL cleaning stuff out of her house.) I love it. I wish I had a guest room to put it in.
Some individual shots of the butterflies. The first butterfly is the Grandpa handkerchief. How cool is that?
Subscribe to:
Posts (Atom)